

The success of your seedlings starts long before they arrive at your doorstep. Preparing your land for seedlings delivery is a critical step that determines the future health and growth of your plants.

Think of land preparation as creating the perfect home for your new plants. Just as you wouldn’t move into an unprepared house, seedlings need their environment to be properly set up for their arrival. This preparation phase:
- Creates optimal soil conditions for root development
- Eliminates competition from existing vegetation
- Ensures proper drainage and moisture retention
- Reduces transplant shock
- Maximizes nutrient availability
Your investment in seedlings deserves the best possible start. Rushing into planting without adequate ground preparation can lead to stunted growth, poor establishment, or complete failure of your planting project. The time and effort you invest in preparing your land directly impacts your seedlings’ survival rate and long-term success.
Let’s explore the essential steps and techniques to prepare your land effectively before your seedlings arrive.
Soil Preparation Techniques for Optimal Seedling Growth
Creating an ideal growing environment starts with proper soil preparation. Here’s what you need to focus on:
1. Remove Unwanted Elements
- Clear all weeds, including their root systems
- Pick out rocks and debris
- Remove old tree stumps and roots
- Clean out any construction waste
2. Test and Balance Soil pH
- Purchase a reliable soil testing kit
- Take samples from different areas of your planting site
- Record pH levels for each area
- Most plants thrive in pH ranges between 6.0 and 7.0
- Acidic soil (below 6.0): add limestone
- Alkaline soil (above 7.0): add sulfur
3. Enhance Soil Fertility
- Mix in well-rotted compost
- Add aged manure for nutrient boost
- Incorporate peat moss to improve drainage
- Use leaf mold to enhance soil structure
4. Avoid These Common Mistakes
- Using fresh manure (can burn roots)
- Adding mushroom compost (too high in nitrogen)
- Over-tilling the soil
- Mixing amendments too deeply
Your soil preparation efforts directly impact seedling survival rates. Plants growing in properly prepared soil develop stronger root systems and show better resistance to diseases. A thorough soil preparation phase gives your seedlings the best possible start in their new environment.

Effective Land Preparation Methods to Consider
Land preparation methods vary in their effectiveness, complexity, and resource requirements. Each approach offers unique benefits for different soil conditions and planting goals.
1. One-Time Tilling
- Breaks up compacted soil quickly
- Allows easy incorporation of amendments
- Drawback: Disrupts beneficial soil organisms
- Best for: Large areas with severely compacted soil
2. Sheet Mulching
- Creates weed barrier using cardboard or newspaper
- Builds soil quality naturally
- Preserves soil structure
- Drawback: Takes time to decompose
- Best for: Small to medium garden areas
3. Double Digging
- Creates deep, loose soil structure
- Improves drainage significantly
- Drawback: Labor-intensive process
- Best for: Clay soils and vegetable gardens
4. Solarizing
- Uses UV-resistant plastic sheets
- Kills weed seeds and pathogens
- Requires minimal physical effort
- Drawback: Weather-dependent
- Best for: Areas with persistent weed problems
5. Animal-Based Preparation
- Uses chickens or pigs for clearing
- Adds natural fertilization
- Creates minimal soil disruption
- Drawback: Requires animal management
- Best for: Sustainable farming practices
The choice of method depends on your specific site conditions, available resources, and timeline. Consider combining multiple approaches for optimal results based on your soil type and planting goals.

Preparing Planting Holes: Best Practices for Successful Transplanting
Proper planting hole preparation sets the foundation for healthy seedling growth. You’ll need to follow specific dimensions and techniques to create an optimal environment for your plants.
Size and Depth Guidelines:
- Dig holes 3x wider than the root ball diameter
- Match the depth to the root ball height – never plant deeper than the original growing level
- Create a rough, textured edge along the sides to encourage root spread
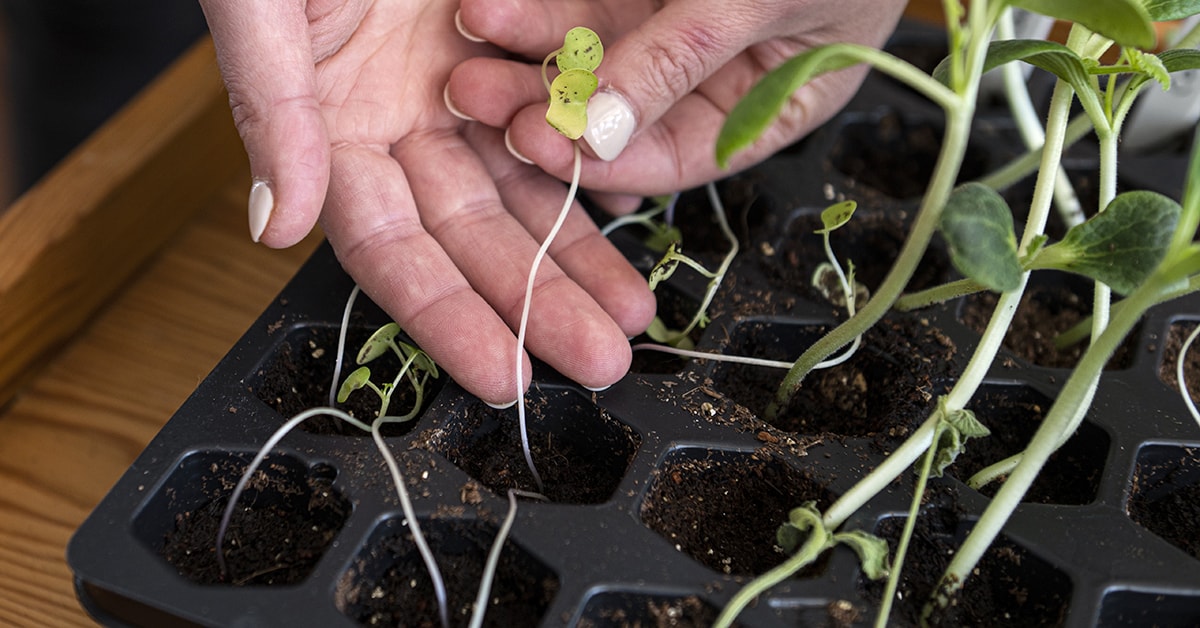
Root Management:
- Gently loosen and spread circling roots before placing in the hole
- Trim damaged or dead roots using clean, sharp pruners
- Position roots outward to promote natural growth patterns
Drainage Considerations:
- Test drainage by filling the hole with water – it should empty within 24 hours
- Add gravel at the bottom for heavy clay soils
- Create a slight mound around the hole’s edge to direct excess water away
Backfilling Tips:
- Use native soil rather than amendments for backfill
- Break up large soil clumps to eliminate air pockets
- Firm the soil gently around roots without compacting
- Leave a shallow basin around the plant for efficient watering
The planting hole serves as your seedling’s new home. Creating the right environment at this stage significantly impacts its survival rate and future growth potential.
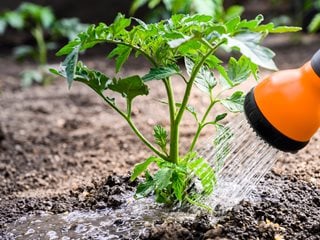
Watering and Mulching Strategies After Planting: Nurturing Your Seedlings’ Establishment Phase
Proper watering techniques create the foundation for successful seedling establishment. You’ll need to water immediately after planting to settle the soil and eliminate air pockets around the roots. Apply water slowly, allowing it to soak deeply into the soil rather than running off the surface.
Effective Watering Schedule:
- Daily watering for the first week
- Every other day during weeks 2-3
- 2-3 times per week for the following month
- Adjust based on rainfall and soil moisture levels
The right mulching strategy protects your seedlings and maintains soil health. A 2-3 inch layer of mulch helps retain moisture, regulate soil temperature, and suppress weed growth.
- Organic Options:
- Straw or hay
- Wood chips
- Pine needles
- Shredded leaves
- Inorganic Options:
- Landscape fabric
- River rocks
- Gravel
Keep mulch 2-3 inches away from seedling stems to prevent rot and disease. Replace organic mulch as it decomposes to maintain its protective benefits. During dry spells, pull back the mulch layer to check soil moisture – if the soil feels dry 2-3 inches deep, it’s time to water.
Timing Matters: When to Prepare Your Land and Plant Seedlings for Optimal Results
The success of your seedlings depends heavily on when you prepare your land and schedule your planting. Here’s what you need to know about optimal timing:
Fall Planting (September – November)
- Ideal for most trees and shrubs
- Cooler temperatures reduce transplant shock
- Root systems develop before winter dormancy
- Natural rainfall reduces watering needs
Spring Planting (March – May)
- Best for frost-sensitive species
- Soil is workable and warming up
- Plants have full growing season ahead
- Natural rainfall supports establishment
Soil Preparation Tips
To achieve the best results, it’s crucial to align your land preparation with your local climate patterns. Here are some essential steps to follow:
- Start pH adjustments 6-12 months before planting.
- Apply organic matter 2-3 months prior.
- Begin weed control measures 4-6 weeks ahead.
- Test soil conditions 2 weeks before planting.
Cold climate gardeners should prepare their soil in late summer for fall planting, while warm climate gardeners can prepare and plant during mild winter months.
Monitoring Your Seedlings’ Progress: Signs of Distress to Watch Out For After Preparing Land and Planting
Regular monitoring helps you identify potential issues early and take corrective action. Watch for these warning signs in your newly planted seedlings:
Physical Indicators
- Wilting leaves despite adequate soil moisture
- Yellow or brown leaf edges
- Stunted growth
- Leaf drop outside normal seasonal patterns
- Stem discoloration or damage
Root Health Signs
- Exposed roots from soil erosion
- Soil pulling away from the plant base
- Water pooling around the plant
Pest and Disease Symptoms
- Holes or irregular patterns in leaves
- White, powdery substance on foliage
- Sticky residue on leaves
- Visible insects or egg clusters
You can prevent many issues by preparing land well and checking your seedlings daily during the first two weeks after planting. Inspect both the plant structure and surrounding soil conditions. Quick identification of problems allows for timely intervention, increasing your seedlings’ survival rate.

Conclusion
Preparing land well is the key to successfully establishing seedlings. By conducting soil tests, making appropriate amendments, and thoroughly preparing the site, you can create the best conditions for seedling growth and increase your chances of successful planting.
The expert advice shared here equips you with proven techniques to transform your land into an ideal environment for young plants. Remember:
- Test your soil before making any amendments
- Choose preparation methods that suit your specific site conditions
- Time your preparations strategically with the planting season
- Monitor and adjust your approach based on seedling response
Your investment in thorough land preparation now creates a strong foundation for healthy, vigorous plant growth. By implementing these expert-recommended practices, you set the stage for thriving gardens, productive orchards, or beautiful landscapes. Take action today – your future seedlings will reward your careful preparation with robust growth and lasting success.
Do you want to learn more about land preparation before planting?
Contact Royal Seedlings:
 Phone: +254 711315313
- Email: Julius.murega@royalseedlings.
com, - Website:www.royalseedlings.com
 Phone: +254 711315313
 Email:
  Website:
FAQs (Frequently Asked Questions)
Why is preparing land before receiving seedlings delivery important?
Proper land preparation is crucial for the success of your planting efforts as it creates an optimal environment for seedlings to thrive, ensuring healthy growth and better establishment.
What soil preparation techniques are essential for optimal seedling growth?
Key soil preparation techniques include removing weeds and debris, testing soil pH levels, and amending the soil to enhance fertility. These steps help create a suitable environment that promotes strong seedling development.
What are effective land preparation methods to consider before planting seedlings?
Effective methods include tilling, mulching, double digging, and solarizing. Each method has its pros and cons, but all aim to improve soil structure, nutrient availability, and weed control to support healthy seedlings.
How should planting holes be prepared for successful transplanting of seedlings?
Planting holes should be appropriately sized to accommodate roots comfortably, with careful handling of circling roots. Ensuring proper drainage in the holes is also vital to prevent waterlogging and promote root health.
What watering and mulching strategies help nurture seedlings after planting?
Watering correctly eliminates air pockets around roots and maintains necessary soil moisture. Applying mulch protects young plants from competing weeds and helps retain soil moisture, fostering a supportive environment during the establishment phase.
When is the best time to prepare land and plant seedlings for optimal results?
Timing should consider seasonal factors that influence seedling establishment. Preparing land and planting during favorable seasons enhances survival rates and growth by aligning with natural environmental conditions.